When it comes to making personalised items of clothing at home, a really simple option is using tie dye. This is a special technique that gives a unique colourful design as the end result, and that is so iconic in our culture that it is still used as a print by many high-end fashion designers. Tie Dye was originally used across Asia and Africa. The oldest-known form of the technique is called Bandhani, which involves dip-dying a piece of fabric which has small pieces of thread tied into it. At the end, there is a white pattern left where the thread was tied. Methods like this must have been used centuries ago by aboriginal tribes and natives of these countries, as it is such a simple way of creating patterned fabric. The world’s oldest example to have been discovered is a selection of silks found in ancient Chinese tombs, believed to have been dyed in around 400BC. In the 60s, during the hippie movement, people wanted to emphasise their individuality, and it was easy to make a statement by wearing clothes with a unique design, meaning tie-dye became one of the most popular fashion choices of the decade.
To begin tie-dying yourself, first you’ll need some fabric dye of whatever colour you like, and a plain white t-shirt that you don’t mind staining. Before you start doing anything, you’ll also want to be wearing an apron or old shirt over your clothes to keep them from being stained, and you should cover your work surface with a plastic sheet or old newspaper.
Now mix the fabric dye. It should say how to do this on the packet that it’s in. You should do this in either enamel or stainless steel containers as using plastic and other materials can cause the container to be stained. Once you’ve mixed it, you can also add a cup of salt to it too, as this will enhance the colour. Now, tie rubber bands tightly around sections of your t-shirt. Where these are tied, the fabric will not be stained. If you want to create a complex pattern of white lines, then you can also draw on to your white t-shirt in coloured chalk first, as this will come off easily in the process of dyeing.
Before dyeing, you should first completely immerse the t-shirt in hot water and then wring it out. Now you are ready to place the t-shirt in the dye. Leave it to soak in the dye for 10 to 30 minutes, stirring frequently with a long enamel or stainless steel spoon. How long you leave it in the dye will depend on how strong you want the colour to be on your final t-shirt.
It is possible to do multiple coloured clothing with this dye too, but it will mean that you must submerge just the appropriate section in each dye and hold it there while it dyes. Now take some tongs, or a big stick and remove your t-shirt. Using rubber gloves, rinse out your t-shirt under warm water and once it is dry it should be ready to wear. Also remember that the first time you wash it in a machine, you should put it in alone as there may still be some dye that is not completely stuck to the fabric and you don’t want to accidentally dye any of your other clothes.
Now that you’ve tie-dyed once, you can start experimenting with different styles and patterns, which we’ll look at in my next article!
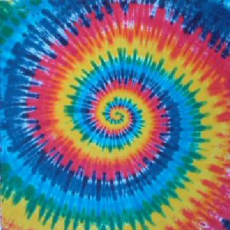
Image from: http://www.tie-dyes.com/images/Tapestry-Rainbow-Spiral-Tie-Dye-bg.jpg

0 Comment:
Be the first one to comment on this article.